Posts

1970 Fox Minibike Resto Mod Final Instalment

Image
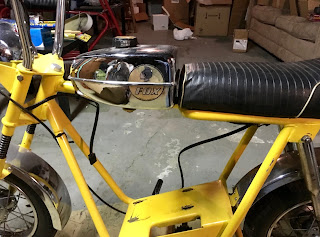
Well, with the test ride proving successful, the refinishing process began.    A brace was welded in across the down tubes, where they meet the headset.    When I widened the down tubes to fit the engine cylinder in, it stretched them just below the triangle gusset that joined them, just below the headset.     Some grinding was necessary to remove the spatter from welding.    Also, the original bearing races in the headset were removed with a long punch.    Measuring the o.d. of the races showed that the upgraded tapered roller bearings used in aftermarket Honda kits would fit.    The new races were tapped in after the grinding was done and they were covered to protect them during the paint process.  Next up, the frame sanding and body filler. The frame was quite rough, with dings, flaked paint, etc. Sanding alone wasn’t going to make it presentable, so a bit of welding to build up gouges and scrapes b...

1970 Fox Minibike Part 10- It’s Alive!

Image
As the tires on the pit bike were worn out, a choice had to be made as to what would replace them.    The little 2.50x 10 size is available in many styles and brands. I ordered a pair of Michelin Starcross tires as they had an aggressive knobby pattern.     It was also a chance to remove the wheel bearings from the hubs and put new ones in.     One of them was a bit loose in the bore, so a prick punch was gently hit in several places to raise the surface the bearing sat in.     I couldn’t find new wheels at reasonable prices, so a good rubbing with Autosol made them shine as much as possible.     The new small tires were tough to install, as the bead is stiff.     Dish soap and patience prevailed! Well, after three months of working on the bike project, the day came to fire it up and take it for a spin.     I changed the oil and put a new drain plug gasket on, not knowing when or if ever the oil had ...

1970 Fox Minibike Part 9

Image
Being unable to find a proper Fox chrome gas tank,  😔 meant finding an alternative. They look so good, nothing comes close. There was no way I was going to use the pit bike tank.  It looked like something from Star Wars!   A friend, George’s dad collected old engines, mowers, tillers, etc. and I grabbed about five different ones.    There were some neat looking types, but n one fit well enough.  I had a black Briggs & Stratton tank left over from other projects, so I used it.   I grabbed an old governor mounting plate and trimmed the original gas tank mounts from it.     These two ends were shaped to fit the main tube of the bike and welded on.  This finished up the tank install.  Being plastic, rust won’t be a problem in the fuel system.  Should I come across a nice Fox tank, I could cut the tabs off easily  and having kept the original tank tabs, it could be installed.  Next, tabs...

1970 Fox Minibike Part 8

Image
I saw a pitbike exhaust online for sale for about $60!  Free delivery, too.  Anyways, once the suspension was figured out, lining up the exhaust system was next. The new larger diameter pipe fit like a charm at the front, but angled upward to much to suit the vintage nature of the bike. It would appear I needed a way to bend the muffler down, but without heating or damaging the chrome on the pipe.  If I cut the pipe ahead of the factory upward bend and fit a sleeve inside the pipe, I could rotate it to the angle I needed.  So, out came the cut off tool and I began.  This would also hide the clamp and cut behind the heat shield. Once clamped and the heat shield was put back on, you’d never know it was bent upwards.  Thanks again to my friend John V for the chrome handle bar pipe and clamp! The rear brake pedal from the pit bike wouldn’t work at all on the Fox bike, so into the parts bin I dug.  I came up with a 1...

1970 Fox Minibike Part 7

Image
I wasn’t happy with how high the bike sat in the rear, as this negatively affected caster in the front.  Positive caster is the rearward tilt of the steering axis as views from the side.  It is a stability angle.  Too little and the bike would be hard to keep in a straight line.  Also the spring in the rear was too weak and provided no means of adjustment.   I ordered a new adjustable heavy duty spring and shock from Keith at PhatMX. He also sold me a set of handlebar mounts for the new 13” bars I ordered online.  They were the closest thing to the original look, I could find. As the new larger spring would only raise the rear even more, I cut the lower shock mount off the swing arm and rotated it back.  This lowered the rear, which increased the caster at the front and allowed me to stiffen up the spring without raising the rear of the bike. Here is the relocated mount below.  It was rotated about 30 degrees rearward, a...